Root Cause Analysis Template | Excel Format with Manufacturing Example
Last updated on December 14th, 2025 at 02:34 pm
Root Cause Analysis Template | Excel Format with Manufacturing Example
Hello readers! Today we are going to discuss on an important topic is RCA (Root Cause Analysis), with details applications with manufacturing examples. If you would like to download the Root Cause Analysis Template in Excel format, then download it from the link given below.
Root Cause Analysis Template sample copy: DOWNLOAD
What is Root Cause Analysis?
RCA (Root Cause Analysis) is the methodology that is used to analyze the problem, defect, issues, deviation, complaint, etc., to find out the root cause. This is a very common methodology used in manufacturing, process, and other industries. RCA methodology consists of many tools and techniques like 5W1H, 5Whys, cause and effect diagram, CAPA, Risk identification, Documentation, etc.
Root Cause Analysis Steps for Effective Results
Root Cause Analysis plays an important role in problem-solving and continuous improvement. There are small and big problems in every company, and a problem becomes a big factor when it becomes a challenge for the company. Hence, we have to do the root cause analysis in time. Below are the steps you can follow for effective root cause analysis.
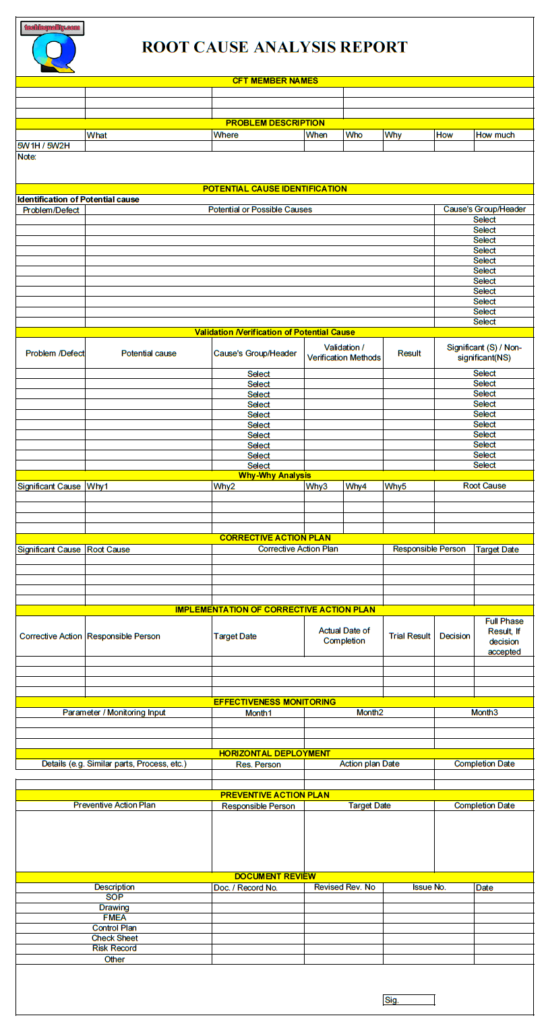
- CFT Formation
- Problem Description
- Potential cause identification
- Validation of the potential cause
- Why-why analysis
- Corrective action plan
- Implementation of the corrective action plan
- Effectiveness monitoring
- Horizontal deployment
- Preventive action plan
- Document review
All the above 11 steps are important for effective root cause analysis and also, and we have prepared the RCA template considering with above points.
Now we will be discussing the details of all 11 steps with manufacturing examples.
CFT Formation
During the cross-functional team formation, you have to keep some important points in mind, all members should be from different functions/departments. Establish the clear roles and responsibilities of each member, make a communication plan, provide training, and support them to get the effective brainstorming section for identification of potential causes and solution ideas.
Suppose a company manufacturing automobile parts has a 5% rejection percentage, and they want to analyze the defects to find out the root cause and implement the action plan to reduce the rejection percentage and to achieve the target value.
As per 1st step of RCA, they form a CFT team for a particular process where the rejection percentage was high. The team members were from multiple departments, including Production, Quality, Maintenance, Tooling, Technical R&D, etc.
Problem Description:
For identification of defect contribution and description, you can use the popular common tools and methodologies like 7QC tools, 5W1H, and 5W2H, etc.
In the above example, you can easily identify the defect contribution by plotting the Pareto chart and describing the problem in any of the one methodologies like 5W1H or 5W2H as applicable. These are the very common tools and methodologies used in industries.
Potential cause identification:
Once you describe the problem, you can start the brainstorming section by selecting a CFT member, and you can represent these by plotting cause & effect diagram / fishbone diagram.
Allow your CFT member to freely identify the potential causes of the defect/ problem. Set a feasible & favorable rule for CFT so that each member can provide you maximum number of potential causes.
Validation of the potential cause
In this step, we have to identify the significant cause among all potential causes, to do so, there are many validation methods are used, like inspection, checking, testing, etc.
Suppose there is a shrinkage defect in an automobile casting part. Through the brainstorming section by CFT members, we have identified the many potential causes, like a wrong gating system, high pouring temperature, low pouring temperature, pouring time, core moisture condition, etc.
So, if you would like to validate those potential causes by a hypothesis test, then you have to collect the data first then, need to execute the applicable hypothesis test. After getting the p-value, you have to conclude a decision. This is one of the methods, but you can also apply the checking methods as well. In this method, you have to check the potential cause result/ condition/ parameter with the Standard specification or SOP or drawing, whether it is meeting the standard or not, if “not meeting the standard” then it’s a significant cause.
Why-why analysis
The 5-whys analysis is the most important step and method. Where you have to ask “why” multiple times to find out the root cause of a problem. Go through the example given below for a better understanding.
Significant cause: Shrinkage
Why1: Why shrinkage on casting part
Why2: Why low pouring temperature
Why3: Why pouring temperature of the last part casting was not monitored/checked
Root Cause: The pouring temperature monitoring /checking procedure was not followed.
Corrective action plan
Based on the root cause you have to prepare the action plan. For the above example, you can take corrective action as periodic awareness training on pouring temperature monitoring.
The action to eliminate the root cause of the problem is called corrective action.
Implementation of the corrective action plan
Before implementing the full phase implementation, you can do the trial implementation of corrective action, if it will be effective then do the full phase implementation.
Effectiveness monitoring
Effectiveness monitoring is essential to measure performance. For example, if you have implemented the action plan for shrinkage defects and started monitoring the shrinkage defect for 3 months, then you can get a clear-cut idea whether your action plan is effective or not. Otherwise, you can drop the corrective action idea and can immediately take the next corrective action plan and again monitor the effectiveness. This process should repeat until it achieves the target.
Horizontal deployment
If you have a similar process, then you can easily deploy the action plan in that process also. For example, if you have another manufacturing plant with the same process, then you can deploy the action plan in another plant also.
Preventive action plan.
The action to eliminate the potential cause of a problem is called preventive action. You can establish and implement the control mechanism for each potential cause can help you to eliminate and reduce the problem.
Document review
Document review & updation are the most important steps. Where you can standardize the process SOP, drawing, FMEA, Control plan, checksheet, Risk record, etc.
Below are some common and popular tools, techniques, methods, and important templates. Those are used directly or indirectly for the RCA, Continuous Improvement project.
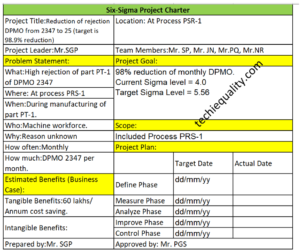
- Six-Sigma Project Charter template
- DMAIC Tools
- SIPOC Template
- C-Chart Excel Template
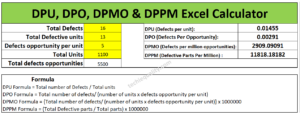
- DPMO & DPPM excel Calculator
- PFD Excel Format
- Z-Score Excel Calculator Template
- KAIZEN Report Template
- MTTR & MTBF Template
- Scatter Diagram Template
- Dispersion Analysis C&E Template
- 3MU (MUDA) Check Sheet
- 4M Checklist
- FTA Template
- Pp & Ppk Template
- Cp & Cpk Template
- CAPA Format.
- Pareto Chart Template.
- Fishbone Diagram Template.
- Histogram Template
- 8D template.
- Control Chart Template.
- Run Chart Excel Template.
- Risk Identification Template.
- OEE Calculation Format
- SWOT Analysis Template
- 5W1H Template
- 5W2H Template
- P Chart Template
- 5 Whys Excel Template
Frequently Asked Questions (FAQ)
What Is a Root Cause Analysis Template?
A root cause analysis template is a structured document used to systematically investigate problems and identify the root causes. The template guides teams through logical steps to ensure permanent corrective actions.
Why Use a Root Cause Analysis Excel Template?
An Excel template is one of the most effective formats for root cause analysis because it is:
- Easy to customize
- Familiar to most teams
- Ideal for data entry and tracking
- Simple to share and update
- Suitable for audits and documentation
A root cause analysis Excel template allows you to capture problems, potential causes, corrective & preventive actions, Horizontal deployment, and results in one structured file.
Root Cause Analysis Format Explained
This standard root cause analysis format in Excel includes the following sections:
- CFT Member Name – Cross-Functional Team’s member list
- Problem Description: Clear description of the issue/problem
- Potential cause identification: To identify the potential cause through CFT
- Validation / Verification of potential cause
- Root Cause Identification – Why the problem occurred
- Corrective Actions – Actions to eliminate the root cause
- Implementation of the corrective action plan
- Effectiveness Verification – Confirmation that the problem is solved
- Horizontal deployment.
- Preventive Action: Actions to eliminate the potential cause
- Document review
This format ensures that problems are solved permanently, not repeatedly.
Free Root Cause Analysis Excel Template Download
Best Practices for Using RCA Templates
- Focus on facts, not assumptions
- Always verify corrective actions
- Use a consistent RCA format
- Involve cross-functional teams
- Document lessons learned
These practices increase the effectiveness of any root cause analysis Excel template.
Common Mistakes in Root Cause Analysis Format
Avoid these common errors:
- Jumping to conclusions
- Treating symptoms instead of causes
- Weak problem statements
- No follow-up on actions
- Poor documentation
Using a structured RCA template helps prevent these mistakes.
What is the best root cause analysis template?
The best root cause analysis template is a clear Excel-based format that includes problem definition, root cause identification, corrective actions, and verification.
How do you format a root cause analysis?
A proper RCA format includes a problem statement, data analysis, root cause determination, corrective actions, and effectiveness checks.
More on TECHIEQUALITY


Simple Moving Average Formula | Calculation | Excel Template | Example
Toyota Production System History
Control Chart Excel Template | How to Plot Control Chart in Excel | Download Template
About Author
TECHIEQUALITY
The Author is an Expert in Quality Management System, Operation Management, Business Excellence, Process Excellence, IATF 16949, ISO 9001, ISO 14001, ISO 45001, ISO 17025, TQM, TPM & QA. He is a Mech. Engg. & MBA graduate, Certified IA of ISO 9001, IATF 16949, ISO 14001, ISO 17025 & ISO 45001 Standard, lead auditor & BB in 6-Sigma.